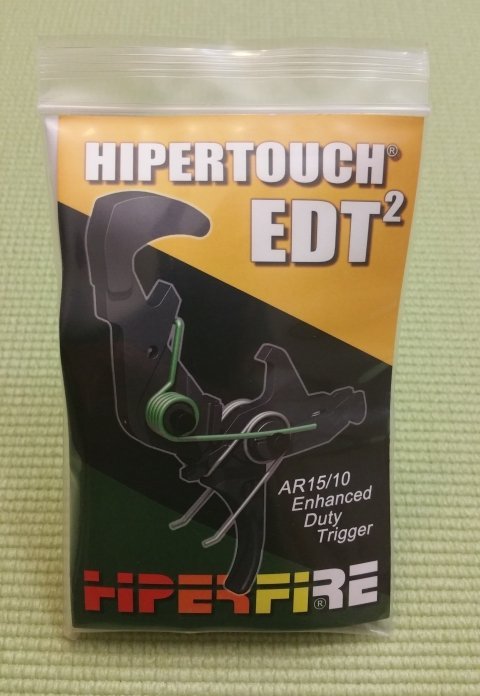
HiperFire EDT2 Trigger – An Easy AR Upgrade

The stock trigger that comes with most factory AR15s does its job, but is often described as “heavy”, “gritty” or “rough”. Thankfully, if you ended up with a less than ideal set of parts, swapping out for a new, aftermarket unit like the HiperFire EDT2 trigger is pretty darn easy. For most owners, this is a task that does not even require the aid of a gunsmith and can be knocked out in about fifteen minutes. It is time well spent, as a nice trigger can increase accuracy and make shooting more fun.
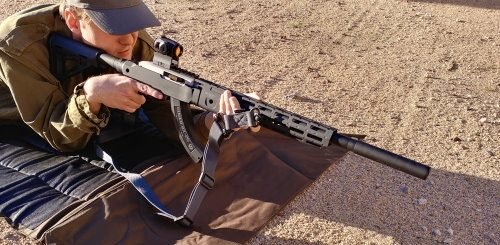
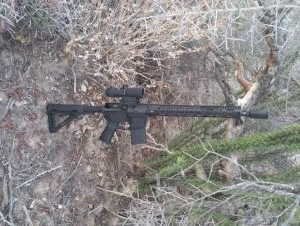
There are dozens and dozens of aftermarket AR15 triggers out there. Some are specialized for target shooting, others for 3-gun or national match competition. However, when considering trigger characteristics for an emergency preparedness type rifle, reliability figures very heavily into the mix. This could be the only firearm at hand and might be needed for anything from dealing with angry dogs in the backyard to junkies kicking their way through the front door. So, when the trigger is pulled, it needs to go “bang” every time.

Just switching out to a trigger with less powerful springs for a lighter pull is not the best option, as your trigger needs to hit the firing pin with enough force to work with US, imported and military primers, since your ammunition choices might be more limited. Also, some target trigger designs have extremely tight tolerances, which are great on the bench but not designed for conditions that could involve more dirt and less cleaning. So, looking at triggers that are based on an improvement of the original US Military design (shown top, above) is a good place to start. This still leaves you with a number of choices, some of which can cost over $300. We picked HiperFire’s Hipertouch EDT2 (shown bottom, above) as it seemed to be one of the best options out there in the sub-$100 price range.
First off, the original military standard design has been re-engineered and manufactured with extra polishing and attention to detail, so it works more smoothly, but without giving up reliability when using harder military primers. The EDT2 is also designed to be self-cleaning, helping to prevent dirty disconnector related issues. Beyond that, it will let us drop the pull weight on our rifle down to 4.5 pounds, which is roughly cutting the firing effort in half. This can be a big contributor to accuracy as well, depending on the user. So, let’s walk through the installation, step by step, showing some tricks along the way and see if we can feel a difference with the new parts.

Installation of the EDT2 is easy, since HiperFire has already done some of the assembly work and includes a drift pin tool in the package. As for extra tools, anyone can do a good job with stuff that they already have around the house. All that might be needed is a hammer for gently tapping stubborn pins and a paperback book to support the lower. Start with making sure that the rifle isn’t loaded and then pushing the two takedown pins out towards the right side, as shown above. The upper half of the rifle can be set aside until the work is complete, as we’re only working with the lower section today.

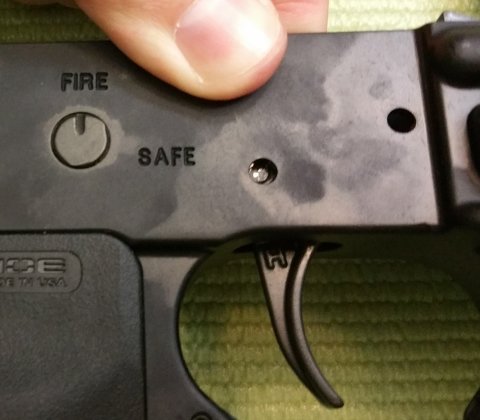
Next, we’ll remove the USGI trigger group, since our example is a factory rifle. (If you’re doing a new build on a lower that doesn’t have an existing trigger already installed, go grab a Coke while the rest of us catch up with you.) Set the safety selector to “fire”, put a thumb on the hammer and gently squeeze the trigger until the hammer can be eased all the way up.
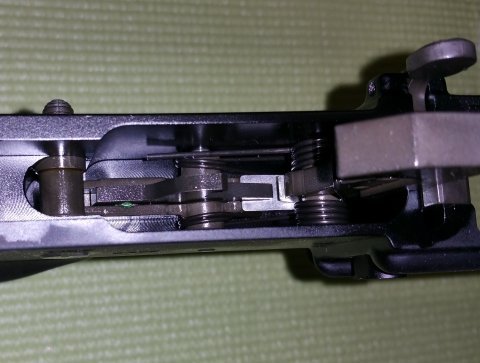
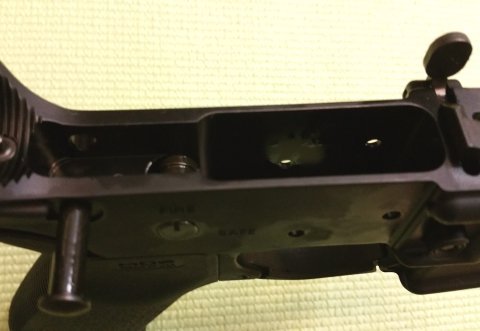
From a top down view into the lower receiver, it looks like there is quite a bit going on in there. However, we’re going to treat all the trigger parts as two assemblies, one for the hammer and the other for the trigger itself. Both assemblies are made up of a few connected parts, but they are each held in place by a single pin.

First we’re going to remove the hammer assembly by pushing out the pin closest to the magazine release button. Now is a good time to put the paperback book under the magwell, so there is space under the lower for the pin to come out. The pointed end of the drift pin tool works well for this job. If the pin is being stubborn, give the back of the drift pin tool a gentle tap or two with a hammer to get things moving. If scratching the lower is a major concern, a protective layer of masking tape can help protect the finish.

Do note, there is a spring wrapped around the hammer, so it is a good idea to keep a finger or two on it once the pin is almost out, so that parts don’t end up on the floor. Once the hammer pin and drift pin tool are out of the hole, the hammer should pop right out.
Next, we’re going to do basically the same thing to remove the trigger pin. There are a few, smaller parts that make up the trigger assembly and could try to escape, so using a thumb on top to keep everything together is a good idea. It can take a little tilting and wiggling to get the trigger assembly free. If it is being particularly stubborn, tilting the front of the trigger up a bit to free the rear from the safety selector can help. Another tip, once the trigger assembly is out of the rifle, the trigger pin can be slid back through the middle of the parts to help keep them together.
Now that the lower has been cleared of all the old trigger parts, we’re ready to start installing the HiperFire EDT2 trigger. This is a good time to put all of the old parts in a ziploc baggie and set them aside, so nothing gets mixed up. The new EDT2 trigger assembly parts are already put together and in their own separate bag. They are held together as a set with a disposable short pin.

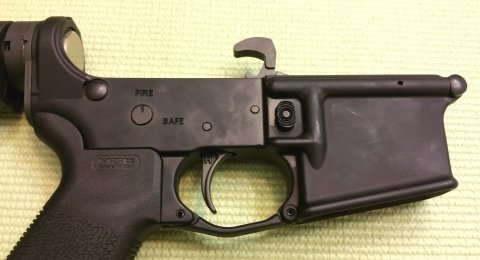
When installing the new trigger assembly, this is the alignment that we’re going to end up with when the parts are in place. Do take note of how the rear of the trigger group overlaps the safety selector.

The easiest way I’ve found to install the trigger assembly is to tilt it slightly to the rear and install at a bit of the angle. Once the back of the assembly is under the safety selector, put the trigger through the appropriate slot in the bottom of the receiver.
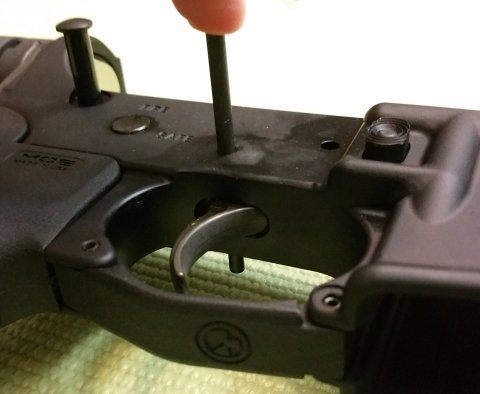
Now that the trigger assembly is in place, align the short, temporary pin in the middle of the assembly with the trigger pin hole in the receiver. Then, use one of the new pins from the Hiperfire bag to push the short pin out of the back of the receiver. If the new pin seems “stuck” about 90% of the way in, check to make sure that the end of the pin is properly aligned with the pin hole on the back side of the receiver. Gently tap with a hammer if necessary.

Once the new pin is in place, the first half of the new trigger is installed. The short pin that came out of the trigger assembly can be set aside, as it has no further use, beyond making that job much easier.

Before installing the hammer, one of two springs needs to be wrapped around it. The red spring will generate a five and a half pound trigger pull, while the green spring will create a four and a half pound trigger pull. We went with green. Do notice the correct way to install the spring is with the U bend behind the hammer and the curls of the spring pointed back and away. The spring installation is just a matter of pulling one set of curls into place and then pulling the other set up and over the other side.

To install the hammer and spring assembly, first insert the legs of the spring into the lower, towards the safety selector. Then, bend the hammer spring down and around by using the top of the hammer to line up the pin holes in the hammer and receiver. This is easiest if the the hammer starts off in the face down position.

Once the hole in the hammer is aligned with the pin holes in the receiver, use the drift pin tool to help hold the hammer in place. This tool makes it easier to line everything up and then slide the hammer pin all the way through both receiver holes. Since the spring is stronger, this can take a little more thumb work than the trigger assembly. Also do note how the legs of the green spring rest on the outside edges of the trigger pin.

Now that everything is in place, we should be all set. Just to make sure, cock the hammer back until it locks, set the selector to “safe” and pull the trigger. If nothing happens, so far, so good. Now, move the selector to “fire”, put a thumb on the hammer and squeeze the trigger until the hammer moves. Repeat this five or ten times, just to make sure everything is working as intended. Lastly, reinstall the upper and dry-fire or shoot about a hundred rounds through the rifle to break everything in and get comfortable with the new trigger.
What did we think of the HiperFire’s Hipertouch EDT2 ? First off, installation was especially easy, due to including the drift pin tool in the package and pre-assembling most of the parts for us. Right away, we could feel the difference in the trigger pull. Not only was the pull weight lower, but the amount of take up before the rifle fired (trigger creep) was noticeably lessened and safety operates smoothly with a positive click into place. As for improvements in accuracy, this will depend greatly upon the operator, but the potential is certainly there for better consistency. The EDT2 has a cleaner break than the factory trigger with a nice, short reset. Are there nicer triggers out there? If a price tag two or three times higher isn’t a issue, then absolutely. But when cost and reliability are major considerations, it would be hard to imagine getting a much better trigger in this price range.